natural dyeing with hops

Natural Dyeing with Hops

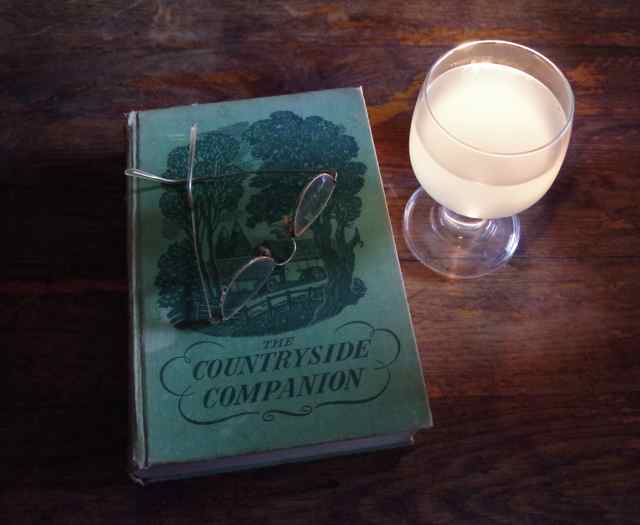
I have always loved the colours that you get with natural dyes, their soft watercolour shades are so very British.

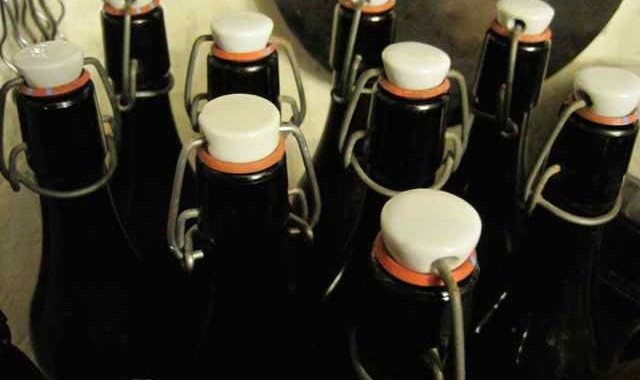
I have been wanting to ‘have a go’  for some while and obviously wanting to experiment dyeing with hops.    When I was searching the internet for information about natural dyeing before hop picking I came across this lovely site .  (Donna and Bill of the hops soda success) and was even more determined to have a go asap.
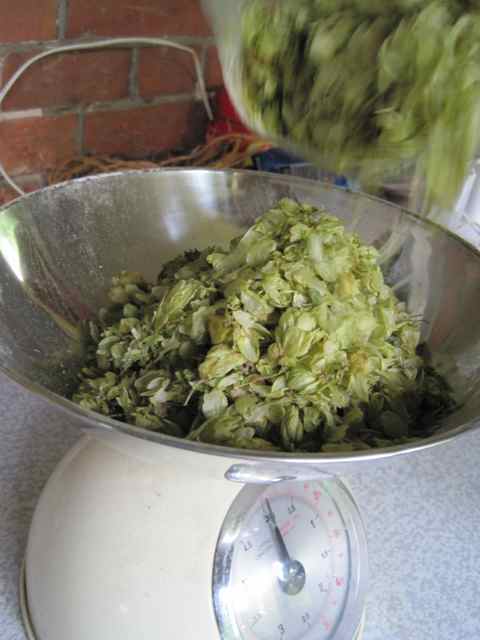
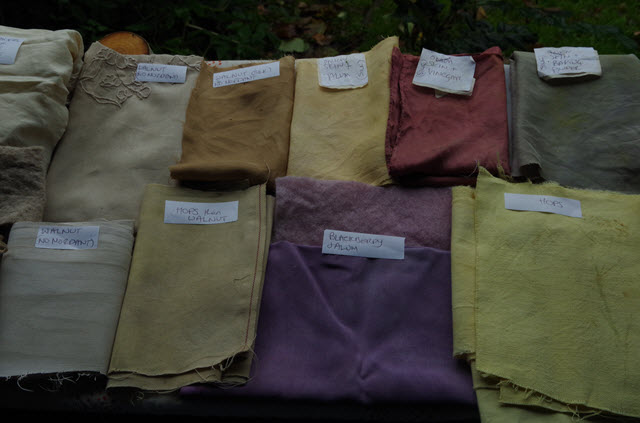
Along with different weights of linen and cotton fabrics, I also used some pieces of silk cut from an old shirt. Gathering up this mixed bags of scraps, I used the few blackberries I had reserved in the freezer, dried hops and some local walnut husks. All set, gloves on and the experiment is ready to begin.
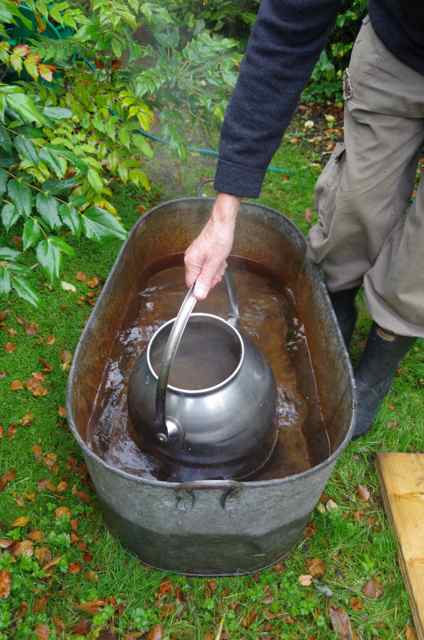
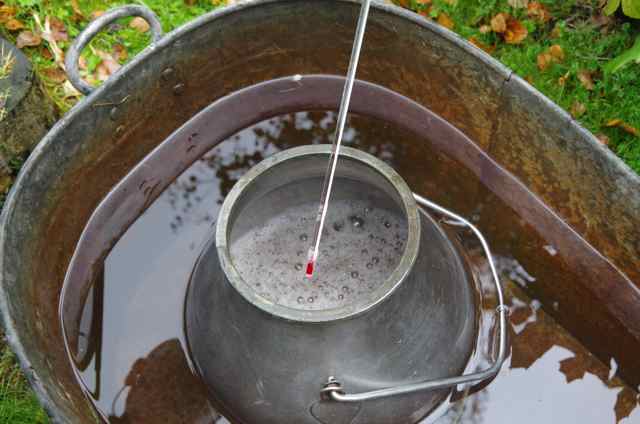
My last efforts had resulted in insipid, wishy washy colours, that literally came out in the first wash, but this time I was using different mordants and used an old aluminium saucepan for the boil. Apparently this is better than stainless steel for some reason which I do not know, but handy anyway as I had this redundant old aluminium saucepan with a good solid base. The mordants I tried this time were vinegar, baking powder and alum.
First I simmered 3 pieces of silk with red onion skins, then divided it up and put each in a separate batch with a different mordant, vinegar, baking powder and alum, after each boil I put the mix into a separate polythene bag and left them all for 2 days.
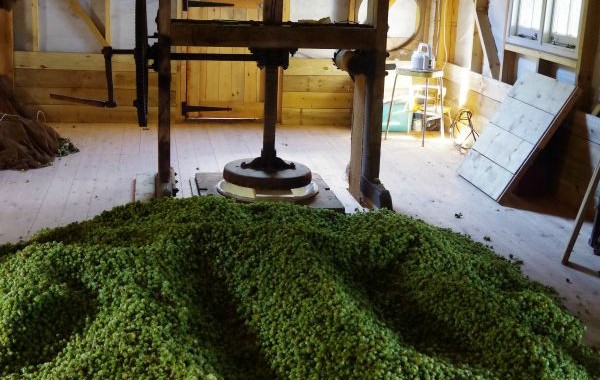
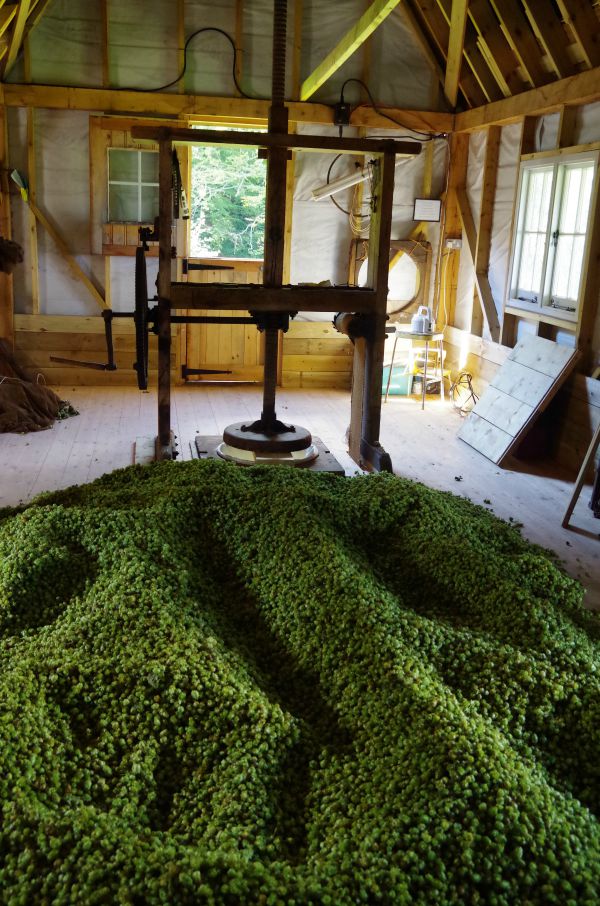
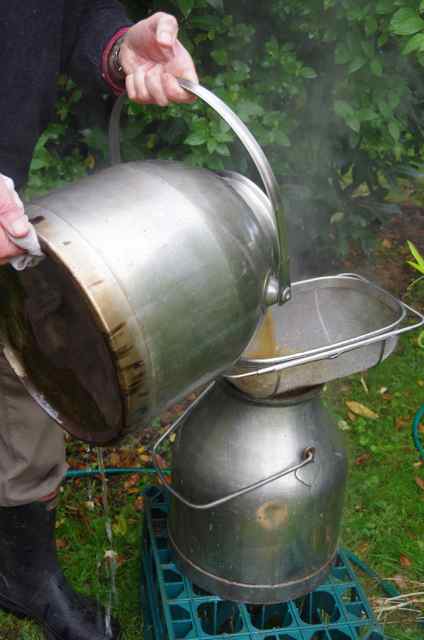
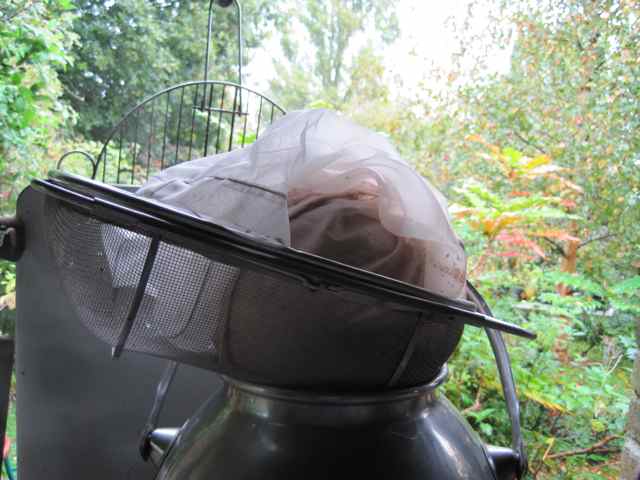
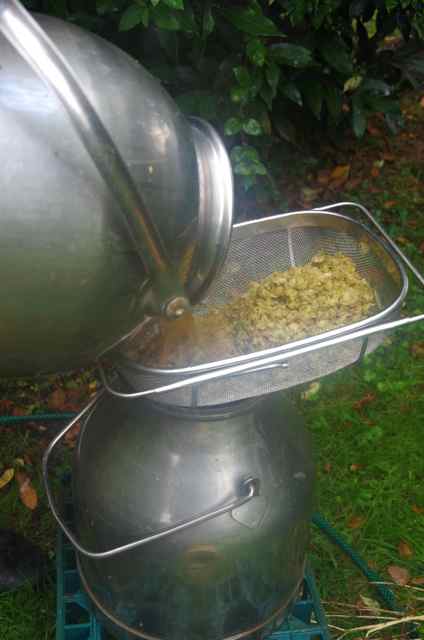
Next I dissolved alum into some water, added 2 handfuls of dried hops boiled them for an hour with the fabrics all mixed in together, then left the whole caboodle for 24 hours to soak outside covered with a lid. I have yet to try vinegar as a mordant with hops and possible baking powder. Not knowing what end results will be is the best bit but not the waiting. Waiting is trickiest, it is hard to be patient but once the soaking time was over, I rinsed them all, then gave them a gentle wash with detergent and hung them out to dry.

dyeing with hops
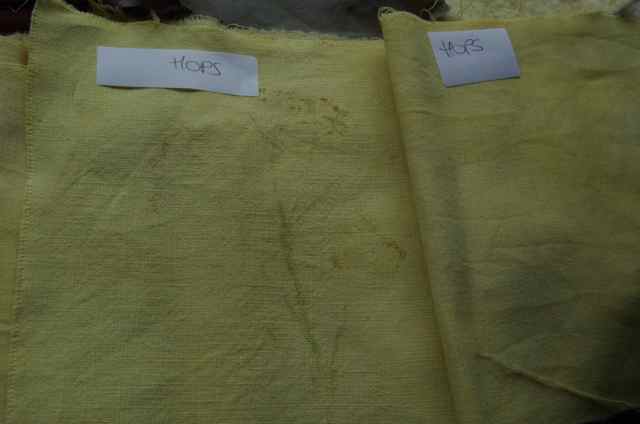
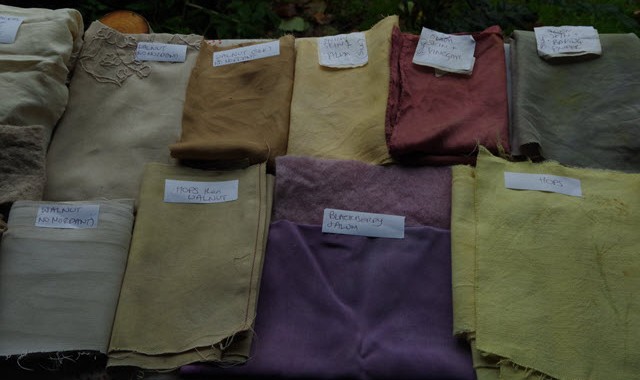
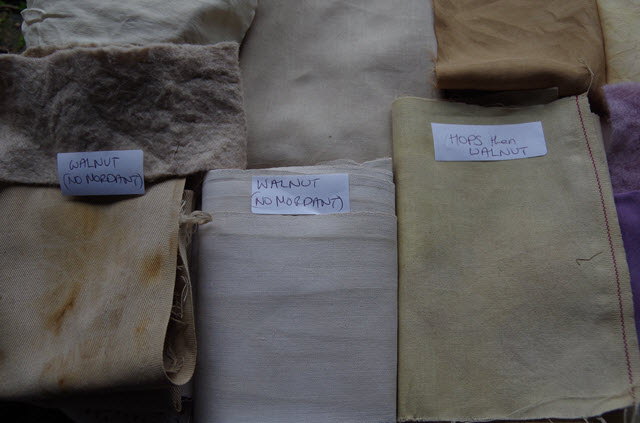
Walnut husks produce a brown dye which does not require a mordant to fix the colour into the cloth. That makes it easy, the whole lot was boiled and left it to soak overnight. It is a shame that dyeing with hops makes a yellow dye as I am not keen on using yellow but a little can enhance other colours in a project. Next spring I will try hop shoots and leaves, they are supposed to produce a brownish red dye.

natural dyeing with hops
The dyeing results from this first session are all shown. I was fascinated to see the differences in colour between the red onion skin dye lots using the 3 different mordants, that was a hey presto moment when they were ironed to fully reveal the colours.

natural dyeing with hops
So what are they for? Well they are all intended for a special project that I am doing with my daughter in Australia. Since she emigrated to Australia with her husband 15 years ago, we have made 4 friendship quilts. Over the months we send and swap little pieces of fabrics in letters, but this time we have decided on a smaller project in the form of a scrap book.
other natural dyeing links:-
http://echoviewnc.com/natural-yarn-dyeing-experiments/
http://www.indiaflint.com/

bill's hop soda

Bill’s Hop Soda

bills hop sodaWhilst doing a casual ramble around the web searching for natural dyeing I found Donna Kallner’s Site.   In it she mentioned her husband’s hop soda which he makes as well as his home brew beer.   I was fascinated, all thoughts of dyeing quickly receded.   I had never come across hop soda.   I contacted Donna to ask her about it and she kindly came straight back with Bill’s recipe, which I pass on below.

I made my first batch with Cascade hops, the result was lovely, a refreshing light grapefruity-flavoured drink, exactly as Donna described.   My main criticism of this first attempt is that I did not leave the hops to steep quite long enough.   Not wanting to mess it up I was too tentative hence had erred on the side of caution…. it could be a teensy bit stronger in flavour.

The hops are not boiled so I think this is what helps make it so fresh tasting.  Next time I will be braver, add a few ‘marmalady’ Admiral hops to the Cascade hops and leave the them to infuse for a little longer than 2 days.   Well just as per Bill’s instructions, ‘until the mix tastes right’ – exactly right, if all else fails follow the instructions!!

Thank you and Cheers to Bill and Donna – this recipe is definitely a keeper.

bill's hop soda

Bill’s Basic Hop Soda
(produces 1 gallon)
1-3 oz. hops (fresh or dry-packed and frozen)
2 cups sugar
1/8 to 1/4 teaspoon champagne yeast
One Step No-Rinse Cleanser
8-10 16-oz. plastic bottles and caps

Method
In a large non-reactive kettle (stainless steel)   combine 1-3 oz. hops  (fresh or dry-packed and frozen) in 2 cups water + 1 cup sugar + 1 T. lemon juice +1 T. lime juice and let soak for a few days until it tastes right (yep, that’s the recipe).

After soaking, use cheesecloth or a straining bag to filter out the solids.

Add 2 quarts water.  Add lemon juice and lime juice and remaining 1 cup sugar now to taste.

Warm the liquid to 120-140 degrees for 10 minutes to kill any wild yeasts.

Cool the mixture to below 90 degrees. Add champagne yeast per packet instructions.

Use One Step No-rinse Cleanser to sterilize bottles, caps and bottling equipment (funnel and measuring cup)

Fill bottles with the cooled mixture and cap. Dent the plastic.

After 24 hours, start checking the bottles. When the dent is pushed out and the bottle feels firm, move the bottles to the refrigerator to slow the fermentation.

Cascade and Citra hop varieties make a grapefruity soda.  Centennial has a bit more bite. I generally prefer a mixture.

Vintage Hop Press Revamp

Whilst servicing goes on throughout the year on any farm, winter is the time for repairs or any major maintenance jobs. This year the hand hop press, which was a very special gift, needed repairing. This ancient J L Larkworthy from Worcestershire wasn’t exactly broken but when it was used last September for the first time since 1982, it had thrown up a problem that definitely needed fixing before next year.

vintage hop press

The hop press works by using the inherent weight of its stem combined with its gearing. The hop pocket is supported underneath by a sling below, the top being secured by a ring at floor level and when the empty pocket is filled up with loose dried hops, the press is put out of gear allowing the pan to fall utilising gravity and its own weight to do the initial stage of each pressing for you. You then put it back into gear and wind down the handle to apply the final pressure needed on each pressing before winding it back up to repeat the process all over again.

dried hops cooling on the floor


You simply repeat this sequence until the hop pocket is full of pressed hops. Each pocket will usually take 8 to 12 pressings to fill, depending on the variety of hops. The pocket is then sewn up and dropped out to the chamber below in a traditional oast and the next pocket put in. In a modern oast, pockets are often pressed into a hole in the concrete floor and then winched out. These days pockets are in fact fast being superseded by square bales which are smaller, easier to lift and move on pallets and more efficient to stack in a warehouse.

What’s to go wrong? Well nothing one would imagine with a hand winding mechanism, all that is needed is to keep the hop press well oiled. However, the out-of-gear initial ‘free fall’ is an important part of the process as hand winding throughout the whole process would make the work painfully slow and tedious, hence you want the press to do what it was designed to do, which is a good percentage of the work for you. The large wheel here weaved out of alignment by an inch, so naturally we thought the cast iron wheel itself was slightly warped. That in itself, though not perfect would have been fine.

However, when using it with hops underneath, it was the first time it was able to be put out of gear to free fall – omg what was that? there was a horrible noise as the cogs on the outside of the large wheel hit the edges of the cast iron casing which hold the gearing, then as the wheel weaved lopsidedly an inch to the other side it touched the main gear cog. Each of these contacts was by only a smidge, but a smidge would be just enough to cause the cast iron teeth to shear off eventually, hence it was top of the list of priority ‘get fixed this winter’ jobs. Oddly it did not hit the sides when it was wound throughout by hand.

The large wheel was removed along with the shaft but it was not the wheel that was bent as we had thought, it was only the very end of the shaft which protrudes from the main press body to hold the large drive wheel, it was barely noticeable at a quick glance.

hop press disassembled for repair

hop press wheel and key-way

This press was built as a hand press around 1900, converted to be used as an electrically operated press in 1970 it was used as such up until1982. The forces are much greater when powered by an electric motor, hence it is most likely that over this 12 year period with these extra forces, this was when the slight bend at the shaft end occurred. This did not show up until it was brought out of retirement and converted back to be used as a hand hop press 33 years later. I do not think there are many or indeed any hand presses being used nowadays, they would simply not be efficient on any large farm.

We took the large drive wheel and shaft to a local engineering firm to be straightened as much as possible and a new key-way was rebuilt.

hop press shaft after straightening and new key way cut

The wheel will always show a very slight weave but this is quite acceptable, the shaft is still original, it is part of its history now and it no longer hits other parts of the frame, so does not matter.

hop press not hitting edges now

Taking things off an old press is one thing but reassembly is quite another, it does not go exactly as you think it should and once the shaft had been straightened it had knock on effect on other bolts and alignment of the metal fixings.  With the wheel off my husband had put on the original handle that had to be cut off when the hop press was electrified.

vintage hop press new handle being welded on

Beautiful, now fully resorted it’s as good as new and rearing to go.

hop press final test to check alignment is all correct before tightening nuts

This wry extract is from a family poem from where the press came from, it was written in 1970 –  this same press gets a mention, as does the nightmare every grower dreads, of having a hop garden down ……

A second hand machine, was the next good buy

It will save us pounds up went the cry.

It came from Cranbrook, all complete

We built the shed and laid concrete.


They fitted new rollers and an electric press

whether it will work is any ones guess.

The next year we grew a tremendous crop

The bines went straight up and over the top.


One week before picking amidst heavy rain

The anchor wires snapped and down it all came!

Thumb’s up for the ‘brew in a bag’ method for an easy home beer making process

I am now on dangerous ground, as the saying warns ‘Fool’s rush in where Angels fear to tread’,  so this Angel is treading very very carefully!   I fully respect that everyone has their own special method to produce their perfect craft beer at home and I am certainly not giving any advise but will only explain my husband’s beer making process and show you the very basic kit which he uses, should anyone be interested.

My husband is a home brewer, but being a farmer first and foremost with the  ‘make, mend and do’  attitude firmly ingrained into his psyche, whilst he has often looked longingly at the Braumeister style apparatus, he remains stoically loyal to the very basic beer brewing kit he already has.  You don’t need any fancy brew kit to get going with the beer making process.   The main components of his home brew hardware did not start out life as beer brewing equipment at all, but has been reinvented for purpose and he would be loathe to change it –  it works well, therefore he reckons if it’s not broken, don’t fix it!

His beer brewing equipment is –

  • 2 stainless steel redundant ex milk buckets, (one for the brewing and one for the fermentation vessel)
  • An old tin bath, which is topped off by an even more ancient gas stove that lives outside (under cover of course)  A practical plus for this stove is that the steam during the hour long rolling boil, all happens outdoors and not in the kitchen.   Another plus for his beer brewing equipment is the simplicity of cleaning it and how little equipment there actually is to clean.
  • A glass hydrometer was a survivor from years ago, during our brief and very variable sortie into wine making
  • A stainless steel strainer we already had.  This strainer has now been requisitioned by the brewing department.   the kit

New kit purchased was:

  • a thermometer
  • tubing for syphoning
  • nylon voile for the bags.  Bags were actually made from fine mesh nylon curtaining which is perfect.  They are best  sewn up to approximately to fit the container being used.  You just need to make sure the bag is kept off the bottom of your vessel whilst the heat is on,  an upturned colander or similar will suffice.

He brews 10 litres at a time rather than what I understand to be the more normal 20  litres. The theory behind these 10 litre brews is that the buckets are easier to lift and recipes can be tweaked or a completely different home beer recipe tried without any concern that you may have lot of beer you do not like.   This has only been the case once so far, he over-hopped a brew that made American IPA’s look insipid!   I thought my hair would curl, but it did make an excellent shandy.

When he first came across  about the Australian ‘brew in a bag’ method   he thought it sounded rather corny, but after trying it, this method is no gimmick.     The basic rules for all brewing are simple – have scrupulously clean equipment and bottles, good quality ingredients, accurate temperatures, accurate timings and in this case careful removal of the bag of malt so it can drain naturally.  Resisting the temptation to give it a squeeze.

I am sure everyone has their own very personal preferences to technique, hence my caution writing about this but if the proof of the pudding is in the eating (or drinking in this case!)   then this method has a full 10/10 and big thumbs up from me.

I am shortly to have a tentative foray in to the world of brewing but using hops and no malt!  But that will be for another time.

Quick guide to the easy home beer making process ‘BREW IN A BAG’ method with one of my husbands recipes

NB -To end up with approx 9 litres to bottle you need to start with 13 litres of water

Ingredients for his American Light Bitter

1.5kg pale malted barley

75gm crystal malt

130gm Polenta

2ozs Goldings hops

1oz Cascade hops

Halfera packet of S-05 yeast

Method

*Bring 13 litres water to 67C

*Put malts and polenta in the voile bag, gently lower and prod carefully down to wet grains (you do not want to introduce any air at this point) Tie top of bag securely to top of the brew vessel.  Steep for 70 mins at 67C.       You can turn off heat if needs be to keep temperature level.

*Remove bag of malt and allow to drain into the vessel. Do not squeeze, it is very tempting! but DON’T DO IT!

allowing the malt to drain- do not squeeze

*Bring wort to a rolling boil for 1 hour in total, adding 1oz golding hops immediately boiling point is reached.

After 30 mins add 1oz Goldings hops then for the last 10 mins of the boil add the Cascade hops.

weighing t he hops

* Strain hops from wort and immediately cool as quickly as possible to 25C.   The old tin bath is perfect here.   To help wort oxygenate at this stage the wort can be strained to and fro between both stainless steel vessels a few times. This also helps speed the cooling.

straining the hops off

coolin gdown

watching the temperature

*Once at 25C stand vessel in warm environment to ferment and add yeast.  My husband uses the open top method with this vessel, covering it with a nylon cover then a clean cotton cloth.

Bottled when hydrometer shows it is ready or after about 10 days.

all done only the wait now

If you are interested to see  this home beer making process of  ‘brewing in a bag’ this lady has it down to a fine art.