Hop Twiddling Time

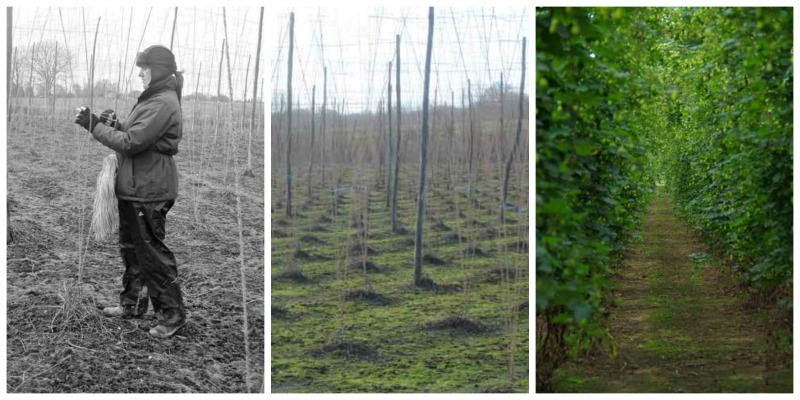
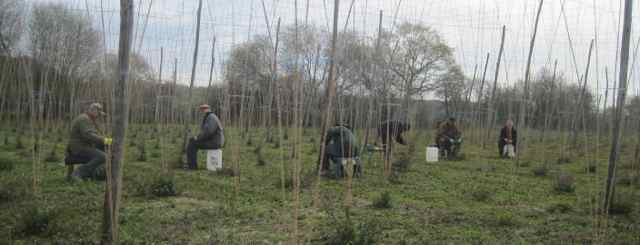
It is hop twiddling time once again in the hop gardens of England and as always a lovely time of year as the countryside greens up and pings back into life. The cooler weather has slowed down this growth, hence we are well on top of the hop twiddling (or hop training as it is also known).  This can change rapidly when the temperature rises, then the bines will shoot up the strings like long dogs; they can grow 6 inches in length on a warm night.

Each hop is trained a minimum of 3 times through the growing season. Twiddling hops is not difficult, it just takes time to do each one and as with all ‘hop’ work it needs a few people to make the day swing along more companionably and to see your progress at the end of each day. Working alone in a hop garden makes any progress seem infinitesimally minute.

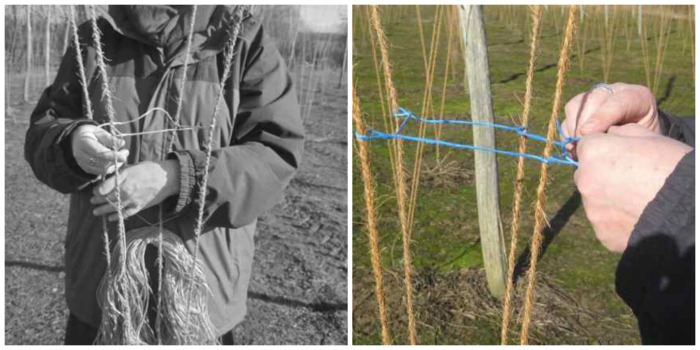
With the typical Admiral hop shown here, you first need to know how many bines you will need to put up, the number required depends on the variety being grown. A quick cursory glance will then show if you have plenty to choose from, it is usually 6 or 8 to go up four strings. The temptation is always to put too many up rather than too few, one for luck is not to be recommended!

This is how I like to twiddle, but other people will have their own way and the end result should be the same. First of all I pull out the very long coarse first bines, they aren’t wanted so best get them out of the way before you start. It is thought that the first growth probably contains mildews which overwinter in these first buds, therefore it’s another reason not to use them. I then select finer bines of the right length,  preferably of a fairly uniform length, approx 14 – 18 inches long which is enough for two or three good turns up the string.  It is best to select them from the middle of the plant if possible, this keeps the hills nicely contained because if you were to take a bine from a runner away from the base of the hop hill this risks getting caught in a tractor tyre later in the season and then broken off.

hops in spring, hop hill, hop training, hop twiddling,

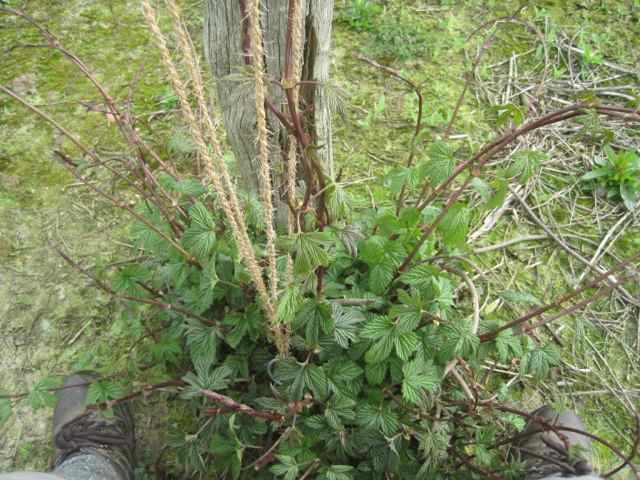
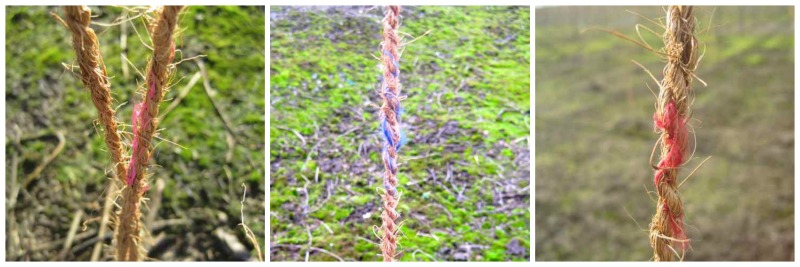
I do a quick check for a long narrow head on each bine, then if you have 2 bines per string you can wind both up each string together. They need to go up the string clockwise, hops follow the sun unlike runner beans which grow in an anti-clockwise direction. If they happen to be put round the wrong way, by next morning they will have unwound themselves. It is good to get them tucked in firmly at the base before you twist them up onto the strings, this is to prevent them being dislodged if you get a windy day before they have really got underway properly. Like the one pictured the plants next to hop poles tend to become stronger plants, possibly they never get run over by a tractor at harvest or it could be they are just more protected.

If the weather is cold and breezy then some varieties will snap easily, if this happens you need to take that bine out and replace it with another which has a head. Warm temperatures are simply kinder for both people and hops.

That is all there is to it really, you pull out the rest of the unwanted bines, then move on to the next hill.
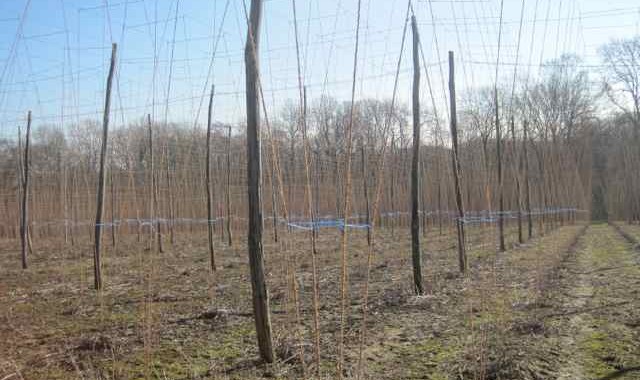
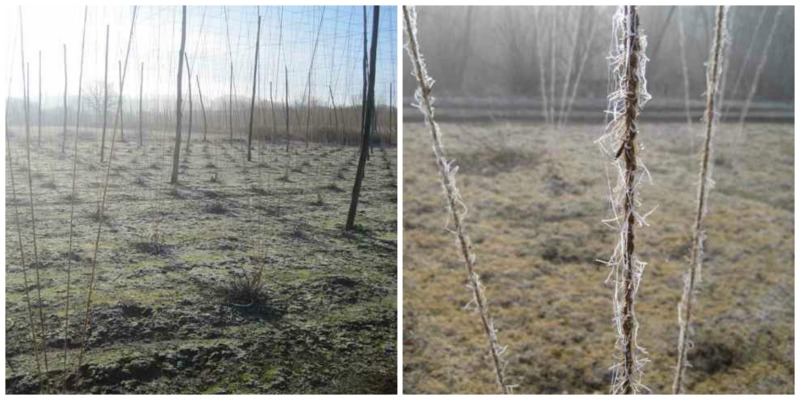
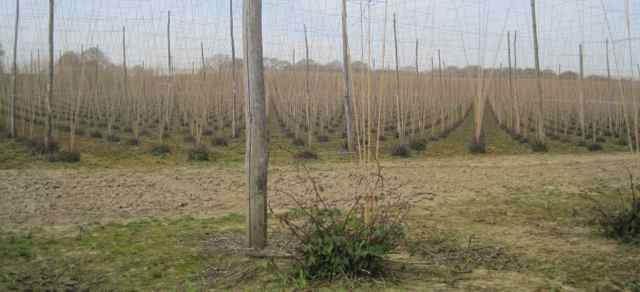
Rules are simple – choose fine bines, make sure they have heads on , decide how many you need for each hop hill and stick to that number. Twist them clockwise up the strings then pull out the rest and move on.   Below shows there are plenty more to be twiddled yet, they just need to grow a little bit more!

hop twiddling, hop training

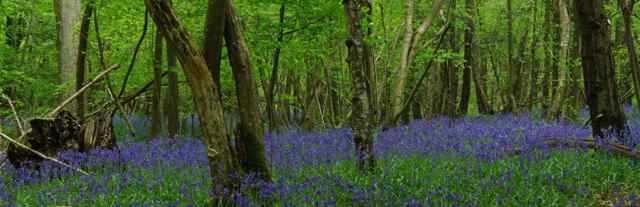
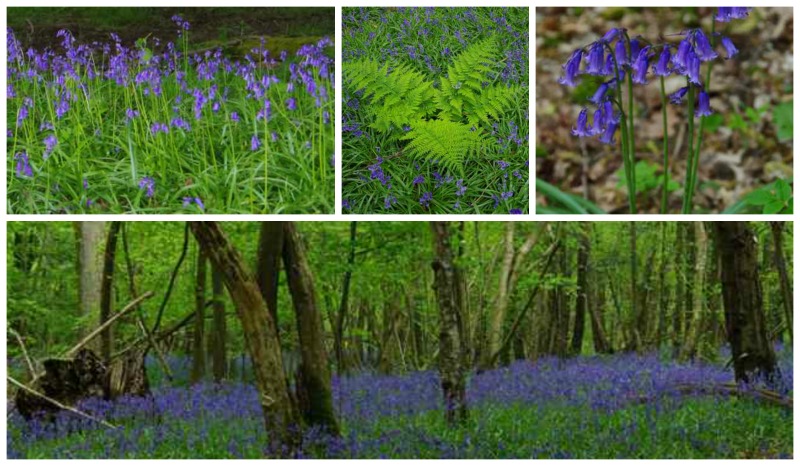
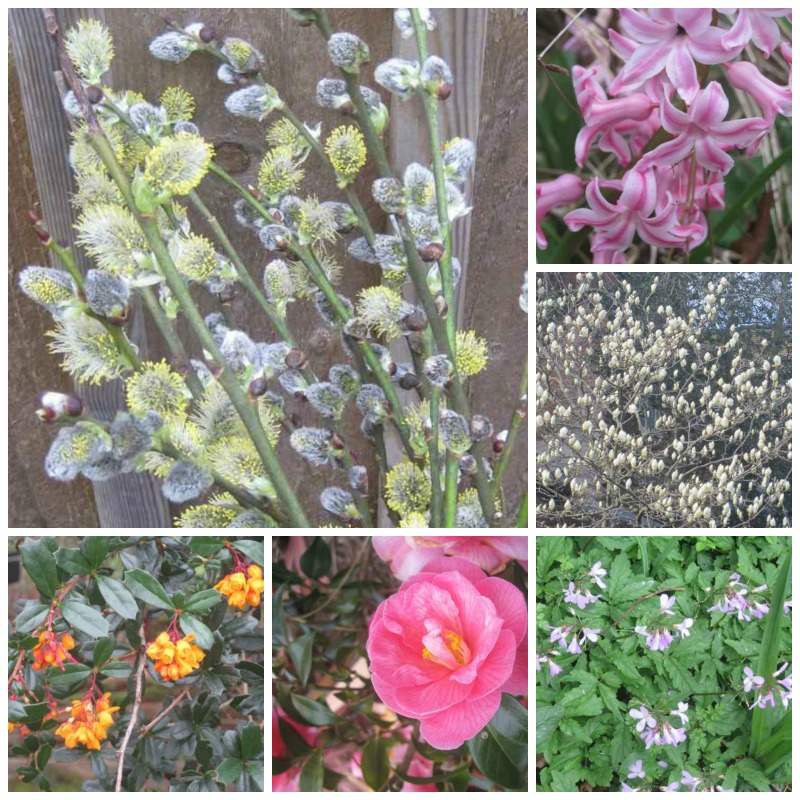
This week I spotted a few Spanish Bells growing fairly close to a bluebell wood. They were probably escapees from nearby cottages but I have dug the bulbs up now and they have been destroyed. We did not want them cross pollinating with the native bluebells.

The winter storms had also dislodged two Barn Owl boxes.  Barn Owls are a protected species, so after having the situation checked by the Barn Owl Trust  we are now able to fix one back in situ knowing there are no eggs. The other has tree ducks nesting in it so that will be secured later in the summer.  Barn owls have been successful around the High Weald in the past, this is probably due to plenty of grassland and some margins close to the boxes which were left rough to encourage short tailed voles. It is wonderful to watch a barn owl flying silently as it hunts at dusk.

Colours of April

spring in England

Spring has been teasing us through March but the early part of this week has made up for that. With the sunshine the banks along the lanes have exploded into colour with a diverse mix of wild flowers. Bluebells are for me the bells of the April Ball  but none of these wild flowers are wallflowers. Dainty stitchwort growing delicately in amongst grasses, the soft mauve hues of the milk maids and bouquets of primroses in swarths along these banks. Violets just blooming under the rapidly greening hedgerows.   Fabulous –  then to cap it off today 16th April, as if to really confirm that Spring has arrived, I heard the cuckoo for the first time this year. It called for about half and hour and then I saw it fly off directly towards the north east. I have never heard and seen the cuckoo for the first time both on the same day and by evening someone else will have the pleasure of hearing him call.  It is exactly as Robert Browning wrote “OH, to be in England now that April’s there”.

natural dyeing with hops

Natural Dyeing with Hops

I have always loved the colours that you get with natural dyes, their soft watercolour shades are so very British.

I have been wanting to ‘have a go’  for some while and obviously wanting to experiment dyeing with hops.    When I was searching the internet for information about natural dyeing before hop picking I came across this lovely site .  (Donna and Bill of the hops soda success) and was even more determined to have a go asap.
Along with different weights of linen and cotton fabrics, I also used some pieces of silk cut from an old shirt. Gathering up this mixed bags of scraps, I used the few blackberries I had reserved in the freezer, dried hops and some local walnut husks. All set, gloves on and the experiment is ready to begin.
My last efforts had resulted in insipid, wishy washy colours, that literally came out in the first wash, but this time I was using different mordants and used an old aluminium saucepan for the boil. Apparently this is better than stainless steel for some reason which I do not know, but handy anyway as I had this redundant old aluminium saucepan with a good solid base. The mordants I tried this time were vinegar, baking powder and alum.
First I simmered 3 pieces of silk with red onion skins, then divided it up and put each in a separate batch with a different mordant, vinegar, baking powder and alum, after each boil I put the mix into a separate polythene bag and left them all for 2 days.
Next I dissolved alum into some water, added 2 handfuls of dried hops boiled them for an hour with the fabrics all mixed in together, then left the whole caboodle for 24 hours to soak outside covered with a lid. I have yet to try vinegar as a mordant with hops and possible baking powder. Not knowing what end results will be is the best bit but not the waiting. Waiting is trickiest, it is hard to be patient but once the soaking time was over, I rinsed them all, then gave them a gentle wash with detergent and hung them out to dry.

dyeing with hops
Walnut husks produce a brown dye which does not require a mordant to fix the colour into the cloth. That makes it easy, the whole lot was boiled and left it to soak overnight. It is a shame that dyeing with hops makes a yellow dye as I am not keen on using yellow but a little can enhance other colours in a project. Next spring I will try hop shoots and leaves, they are supposed to produce a brownish red dye.

natural dyeing with hops
The dyeing results from this first session are all shown. I was fascinated to see the differences in colour between the red onion skin dye lots using the 3 different mordants, that was a hey presto moment when they were ironed to fully reveal the colours.

natural dyeing with hops
So what are they for? Well they are all intended for a special project that I am doing with my daughter in Australia. Since she emigrated to Australia with her husband 15 years ago, we have made 4 friendship quilts. Over the months we send and swap little pieces of fabrics in letters, but this time we have decided on a smaller project in the form of a scrap book.
other natural dyeing links:-
http://echoviewnc.com/natural-yarn-dyeing-experiments/
http://www.indiaflint.com/

hop viniculture structure, hop garden, hop growing

Essential Hop Viniculture

Essential for any hop viniculture venture is a framework for the vines, or more correctly hop bines, to climb up and framework sturdy enough not to blow over as harvest nears when the vines are at the heaviest. I like to think that hops and hop viniculture are to the UK what grapes and grape viniculture are to the French. I may be biased of course, but with beer there is an infinite combination of malts, hop varieties, yeast and water to challenge and keep any brewer or drinker fascinated for years. With some excellent new beers and up and coming micro breweries this complexity and diversity of flavours is to be celebrated.

Art work for the labels for some of these new breweries is another interesting factor.  For instance two local Sussex Breweries have outstanding labels –

The Three Leg Brewery  used local artist Jo Waterhouse  for their art work,  whilst  The High Weald Brewery  used  Studio Parr  for their equally amazing label creations.

Rach Smith in her beer blog takes a look at Sussex Bottled Beers which again reviews some interesting labels, in addition to the contents of course!  Among her beer selection, this post also includes the two above breweries.

Meanwhile back at the ranch, this has certainly been a first, and not to be recommended, completely unconventional hop garden extension. The hop setts were planted first, well before any sign of this hop vinicultural framework making its appearance! However, I am so pleased that the setts were planted when they were, these recent rains will have bedded them in nicely before the ground dries this summer. The cause for the delay was the exceptionally wet ground for the whole of this winter. We normally get a spell of cold weather which freezes the ground hard enough to allow you to get onto the land for this sort of winter job without doing any damage.

As soon as the ground was dry enough to get the tractor on the garden without causing any ruts, the poles were augured in, top wires put up and anchors attached. Phew, a great relief. Hurray and three cheers but only just in the nick of time as the hops are beginning to shoot.

hop viniculture, putting up a hop garden, hop growing

Hooks were put on these top wires this week to finalise the job and now it is all ready set for stringing, I like to leave this as long as possible in this garden as the deer will walk through, often breaking the strings which is a constant nuisance, hence the reason I am not in a rush to get this done. There’s not much movement yet, but you can ‘hear’ the hop plants readying themselves on their starting blocks for their annual dash up the strings.

hooker 2

hooker tool. vintage toolsBut as with most things there is a balance to achieve. A priority is that I like to get the first young bine, especially from any young hop setts, up onto the strings. This is in case any rabbits come along, they are less likely to nibble these vulnerable and probably tasty shoots once they are going up the strings. Later on rabbits can be a nuisance by occasionally biting the strings through along with the mature hop bine for no apparent reason. Perhaps rabbits need to sharpen their teeth?? Whatever the reason, it is a pain, they just bite the stems and strings but don’t eat them, the result is that hop dies back, such a waste.

screw pegs, hop growing, hop viniculture, hop setts, 
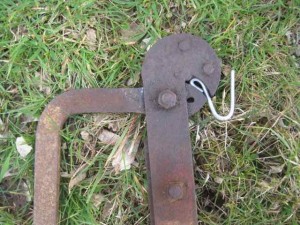
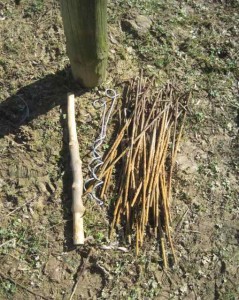
Another outstanding job before stringing and before the ground dries up, was to replace some screw pegs. This type of peg has not been successful. When the hops were up the strings once the wind blew they turned upside down allowing the strings to come off. This is more sensitive in the Sussex Zig Zag system so they needed to be replaced for this year. Luckily only two rows had them and now all have the ‘proper’ spiral screw pegs in situ.


bill's hop soda

Bill’s Hop Soda

bills hop soda
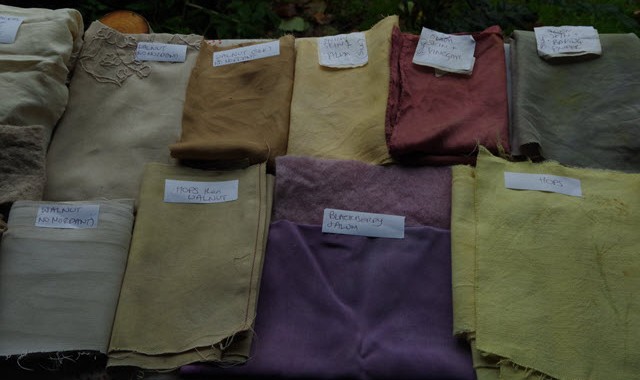
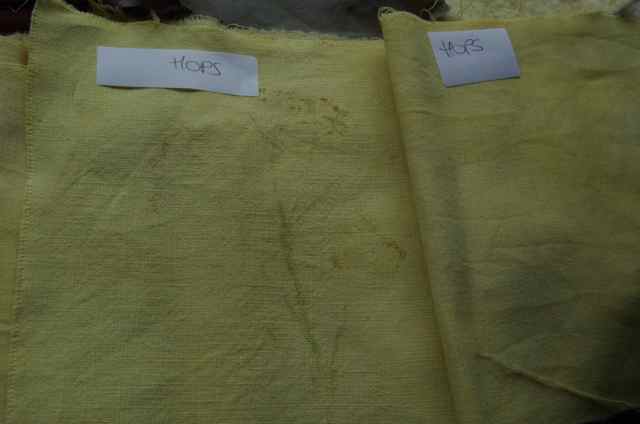
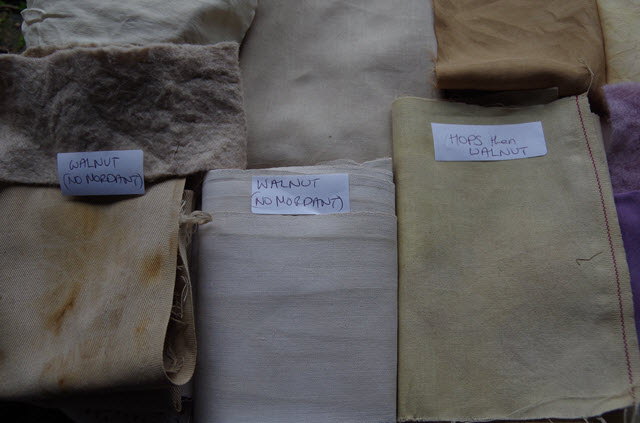
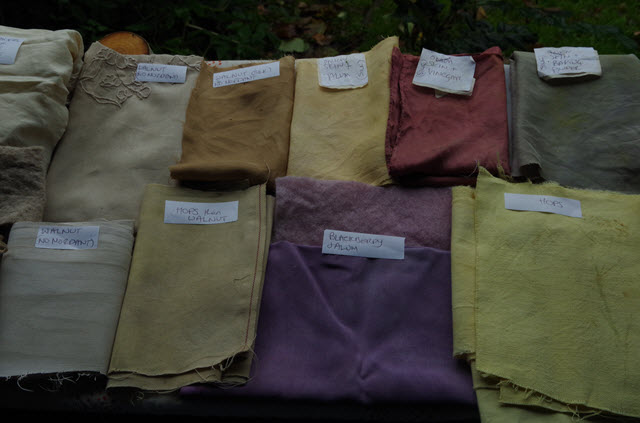
Whilst doing a casual ramble around the web searching for natural dyeing I found Donna Kallner’s Site.   In it she mentioned her husband’s hop soda which he makes as well as his home brew beer.   I was fascinated, all thoughts of dyeing quickly receded.   I had never come across hop soda.   I contacted Donna to ask her about it and she kindly came straight back with Bill’s recipe, which I pass on below.

I made my first batch with Cascade hops, the result was lovely, a refreshing light grapefruity-flavoured drink, exactly as Donna described.   My main criticism of this first attempt is that I did not leave the hops to steep quite long enough.   Not wanting to mess it up I was too tentative hence had erred on the side of caution…. it could be a teensy bit stronger in flavour.

The hops are not boiled so I think this is what helps make it so fresh tasting.  Next time I will be braver, add a few ‘marmalady’ Admiral hops to the Cascade hops and leave the them to infuse for a little longer than 2 days.   Well just as per Bill’s instructions, ‘until the mix tastes right’ – exactly right, if all else fails follow the instructions!!

Thank you and Cheers to Bill and Donna – this recipe is definitely a keeper.

bill's hop soda

Bill’s Basic Hop Soda
(produces 1 gallon)
1-3 oz. hops (fresh or dry-packed and frozen)
2 cups sugar
1/8 to 1/4 teaspoon champagne yeast
One Step No-Rinse Cleanser
8-10 16-oz. plastic bottles and caps

Method
In a large non-reactive kettle (stainless steel)   combine 1-3 oz. hops  (fresh or dry-packed and frozen) in 2 cups water + 1 cup sugar + 1 T. lemon juice +1 T. lime juice and let soak for a few days until it tastes right (yep, that’s the recipe).

After soaking, use cheesecloth or a straining bag to filter out the solids.

Add 2 quarts water.  Add lemon juice and lime juice and remaining 1 cup sugar now to taste.

Warm the liquid to 120-140 degrees for 10 minutes to kill any wild yeasts.

Cool the mixture to below 90 degrees. Add champagne yeast per packet instructions.

Use One Step No-rinse Cleanser to sterilize bottles, caps and bottling equipment (funnel and measuring cup)

Fill bottles with the cooled mixture and cap. Dent the plastic.

After 24 hours, start checking the bottles. When the dent is pushed out and the bottle feels firm, move the bottles to the refrigerator to slow the fermentation.

Cascade and Citra hop varieties make a grapefruity soda.  Centennial has a bit more bite. I generally prefer a mixture.

hop twiddling stick, home brewing, english hops, in the hop gardens, seasonal hop work,hops for the home brewer

Choosing a Hop Twiddling Stick

Winter, is the best time choose your hop twiddling stick. The trees are still bare making it easier spot a good one and the sap has not yet risen.

hop twiddling stick, hop growers year


The Hazel is one of our native trees found growing in classic coppiced woodlands, it is a very useful tree. Its wood is used in many diverse ways from water divining sticks, traditional sheep hurdles, to the thick straight rods which have been used for generations of gardeners as runner bean sticks. Hazel provides all manner of riches but it is the tall straight rods of medium thickness which I am looking for,  I can select my new hop twiddling stick from amongst these.   These straight rods are called summer or sun shoots.

For the best hop twiddling stick ideally you need a straight rod with the right shaped fork, not too tight and not too wide, this fork will need to trap a hop bine head without pinching it thereby snapping the head off. The rod has to be the right thickness, too thin and it will not be up to the job and too thick it will be cumbersome and make your arms ache lifting it up to manoeuvre it above your head all day. So as Goldilocks said it has to be ‘just right’.

hop twiddling stick, handbill,
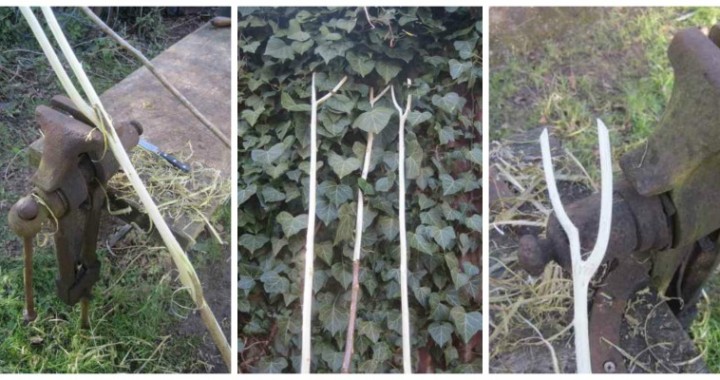
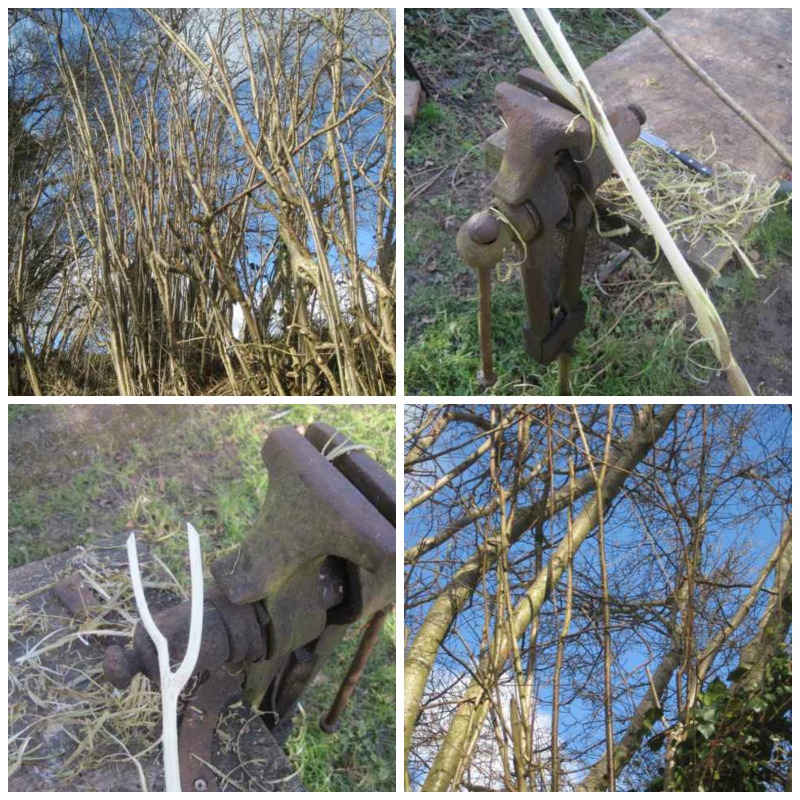
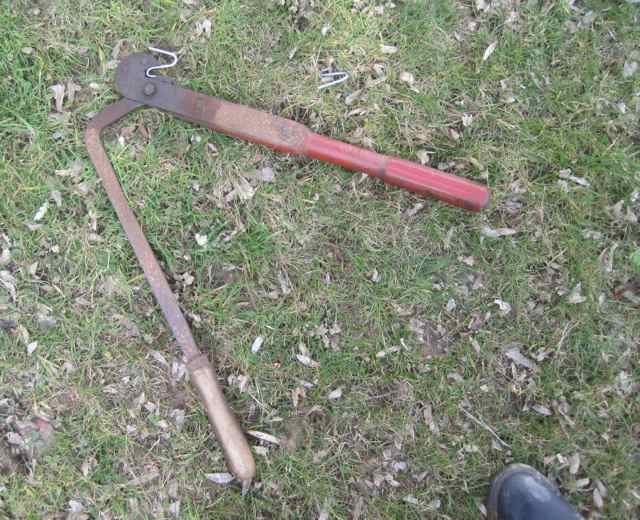
So first find your perfect hop twiddling stick, then cut it out, trim both ends and debark it if you prefer. It does need to run smoothly in your hands so no untrimmed notches should be left. When I have cut a few I tie them to a length of wood to allow them to dry out and remain nice and straight. I actually like a fork with a kink one side like the one shown, I find this slight bend runs nicely up the strings.

Hop twiddling sticks are needed for ‘Heading’ which is the third and final stage of hop training every year. Each hop plant is trained by hand at least twice during their growing season but usually 3 times. By mid May the rapidly growing bines of most varieties are far out of reach for easy hand work. In order to put any heads back onto the strings it is then that we need our hop twiddling sticks.

hop twiddling sticks, growing hops
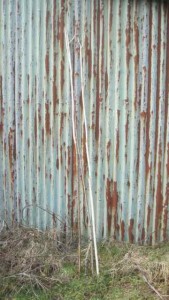
Like any personal hand tool you just get used to your own hop twiddling stick, It is just easier to use your own, but it is not something you can share easily either. You would always be waiting for the other person to finish using it. Whilst most people would not dream of sharing their special stick, if you are lucky they might offer to do your hop instead!

Another use for your hop twiddling stick is to mark your hop plant with it, it is now surprisingly easy to stray off course and loose exactly where you were in the hop garden. You can leave it in the plant you have got to at the end of the day or simply mark your hop when you go for lunch, as I said earlier it is very easy to loose your place once the hops are full size.

If you find a stick you like, look after it and keep it oiled between seasons. They can be found tied onto the beams in barns etc.  Someone moving into a cottage in this area found a twiddling stick which had been carefully tied above the stair well by its previous owner.

I have an assortment of three hop twiddling sticks. A short one, only 3 foot long for bines only just out of reach slightly above head height and then a longer one for the main heading work when the hops are much higher, this is about 8 foot long. The wirework can be up to 18 foot high. Again as with most jobs, there is a knack to heading hops but it is easy once you have got it, rather like learning to ride a bike. If you are right handed you hold the stick in your right hand. You don’t try to put the heads back onto the strings which seems logical, but rather twist the string and allow the hop to stay still. To do this you hold the string in your left hand and twist the string around towards you in a clockwise direction, then catch the head of the bine into the fork of the stick, place the ‘v’ of the stick with the head held in it against the string and untwist the string anti-clockwise. That way the head will normally seat itself back easily following its clockwise natural twist. If you get an awkward hop you sometimes feel like your head will fall off instead!!

Sun glasses are essential kit, not only to protect your eyes from the sun but they stop any small bits of plant debris from falling into your eyes as you move the plants.

Sometimes after summer storms and the hop bines have been off their strings for a while they can become long and heavy, then it is not so easy. I then find using two sticks which while it may look awkward, is the easiest way of dealing with the problem without damaging the bine or breaking the head off.  So holding the offending hop with one hop twiddling stick and putting the head back on with the other prevents this damage and is much easier than it looks. I have to admit it does looks downright plain awkward, so best solution don’t watch anyone else doing it.

The pictures below show the same stick before and after cutting, it is the one on the left of the group.

hop twiddling stick, hops for the home brewer

Once the hops are safely up and over the top wires, we all breathe a sigh of relief, that will be the last of heads coming off for this year. Traditionally bines should be over the top wires by Midsummer’s day but some varieties can be over the top long before then.

root crop fork

Hovering Up Hops when Drying in an Oast House

It has been a week of unexpected treats, the foremost is that I have been given a hovering up fork and I am chuffed to bits. This was a super practical surprise gift from a very special friend and I could not be more delighted. This is the fork he had always used for hovering up his hops as they sat on the drying floor in the oast house for their allotted drying time and which he had found perfect for purpose. Hence he thought I might like it! Like it, well I am jumping for joy.

When traditionally drying hops with charcoal in an oast house I do not then have the advantage of the modern oil unit fans which force air through the bed of green hops. With this traditionally method of drying hops you utilise natural draft, so I needed to find a way of hovering up the hops as they sat on the kiln during their designated drying time. Hovering up basically means moving the hops very gently by lifting the hovering up fork through the bed of hops to carefully loosen any compact areas by shifting their positions.  This ensures even drying, hence this gift could not be more perfect or, more perfectly timed. When drying hops in this old-fashioned way, it not only takes longer but I keep the temperature within the lower drying range to preserve the natural oils in the hops.

I had been toying with different ideas of how to make a flat pronged wooden fork for hovering up the hops, but the round ends on this one prevent you getting all in a toe-tangle by catching up the lifter clothes under the hops.
root crop fork

Before my friend upcycled this fork it was not originally made for hovering up hops. I understand it was a root crop fork which would have been used to move root crops like turnips and mangels.  The rounded end simply prevented the roots from being spiked.

The second treat was that the sun shone this week making banding-in a pleasure and still no chilly fingers this year. I think this is a record and we should wrap up the banding shortly.

Thirdly, while not exactly a treat as such, I have finished a seasonal job which is satisfyingly shaving chestnut sm
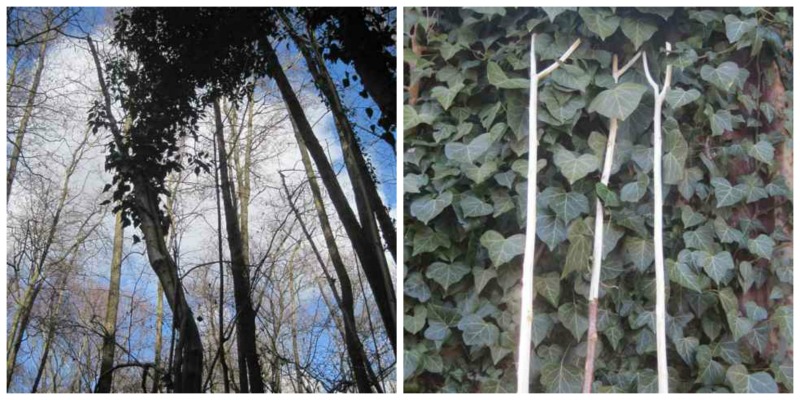
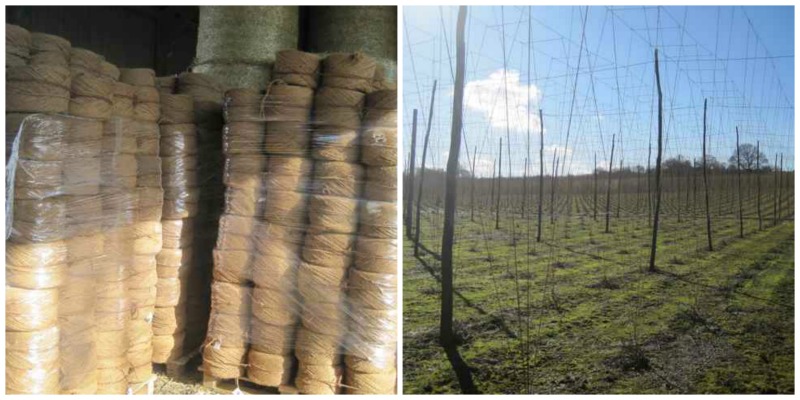
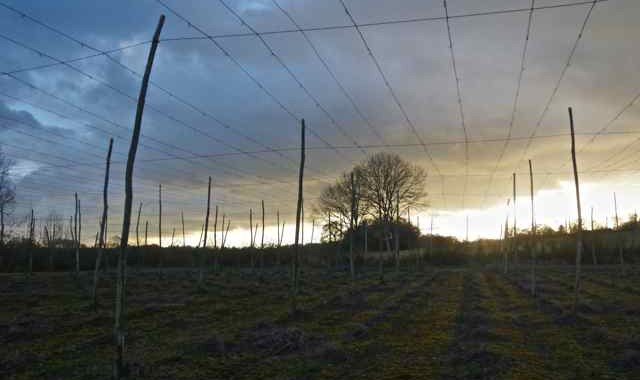
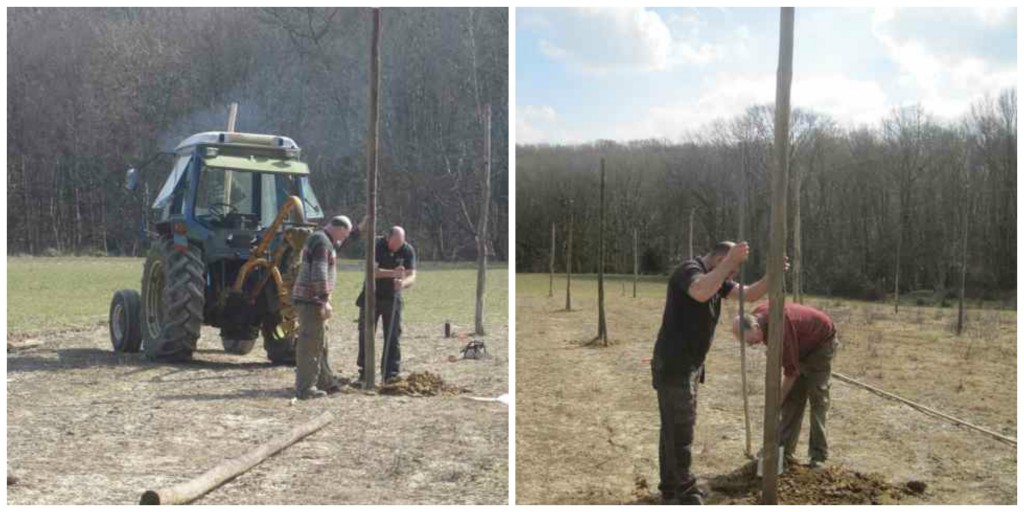
rewarding. So with the sun shining I completed  debarking some chestnut poles for the new section of the hop garden. Normally the hop garden would go up before the hop setts were planted but this time, it is of necessity back to front. Then the ground was far too wet this winter to get on it with a tractor to auger in the hop poles prior to planting. So the hop setts went in and as soon as the ground is dry enough these poles can be put in to make the extension. Wirework and hooking for the stringing can then be added to the poles, as I said a very back to front. The Sussex Zig Zag is proving to be unorthodox all round!

Whilst shaving the chestnut I thought how amazing the patterns on the bark were, a close up shot could almost be mistaken as an image of the earth from space.

chestnut bark

Here in the High Weald we are blessed with acres of stunning ancient woodlands and miles of hedgerows, amazing in their variety of species. However, there are huge clouds in the landscape, I cannot say horizon as these problems are already upon us, we have a tree disease which is  affecting our sweet chestnut trees .  This is in addition to the serious Ash and Oak die back diseases, and horse chestnut problems. With that and the huge deer population now ensconced in this area, our beautiful woodlands are seriously threatened.

hop banding in strings

Banding-in The Hop Strings

The first job of the hop growing year is hop stringing and banding-in, it is the true beginning of the growing season. Winter is usually when any wire-working renewal or repairs are conducted, but stringing which starts in late winter or very early spring in this area is one job that is nice to get done, dusted and out of the way before the weather warms and the main season for farm work starts. It is a job where heavy tractors aren’t needed on the land, hence it is perfect for when the ground is soft as only man power is required.

hop stringing


Stringing the hops is normally man’s work which goes hand in hand with banding-in which is generally ladies work. This is not for any chauvinistic reasons, it is just that it makes sense that as the men are stringing we ladies can do the banding-in. That way the job gets done efficiently and after all, we are all working towards the same end.

banding-in

It seems it has always been thus! Have a look at the Pathe news clip of stringing and banding-in competition, it is a joy to watch but our men do not move as fast as this! This early season here has more a relaxed, less urgent air.

In fact the whole Pathe news clip series is a wonderful archive of days past. It is interesting that not much has changed in the growing of hops other that the amount of folk that were needed to get the crop hand picked at harvest back then. Thank you to the Pathe team for permission to allow me to include their links in my posts.

There are several different patterns for stringing and not all of the patterns require banding-in. The reason that it is necessary for the more upright ‘umbrella work’ style of stringing is simply to hold the strings back to stop them falling into the centre of the alleys. By banding-in the 4 strings on each hop hill, this forms a tunnel for a tractor to drive down each hop alley once the hops are full grown and more especially when they are heavy and wet.

banding-in and hop tunnel

Banding-in is an easy job, it’s not physically demanding and with a happy companion and a few shared interests to discuss, the days out-of-doors slip past pleasantly. Hands fly on automatic pilot – 1 half hitch, 3 alternating twists and a reef knot, move onto the next hill and repeat, it is a job that allows for easy conversation as you go along.

banding-in close up

If you are on your own, wildlife seem unconcerned by a solitary figure moving slowly through the strings, you can then daydream or think, it’s repetitive nature is meditative. If bored with your own company you can always listen to a personal radio of course!

Those are the pleasant things about banding-in and as with most seasonal jobs on a farm while it may not need much brain power, or work which you may not like, but you can take heart in that it will not last for very long. Extra layers of clothing can be discarded if the sun comes out, but if it gets colder the layers of clothing rapidly go back on and at times we can end up resembling extras from a scene in a film set in deepest coldest Siberia.

frosty hop strings

Downside, well like all jobs it certainly has one and this one is chilly finger tips. Everything else can be covered with layers and you can keep warm, but if the strings are wet with dew or rain and especially on breezy days, finger tips quickly become painfully cold. Frosty strings in the morning are worse! Brr cups of hot drink are needed more for warming hands than for quenching thirst, but so far this year it has been a good one for toasty fingers.

flask to warm hands

It may seem like a ‘nothing much’ job but as with everything to do with growing hops every little insignificant piece is part of the larger jigsaw and the majority of it is hand work. There is something in nothing if you allow yourself to be interested and see the point of the end result.

The string used in hop gardens is coconut fibre made from the outer husks of coconuts, it is collected and spun in Sri Lanka It is hairy and coarse making it perfect for the bines to climb up in their rapid assent to the top of the wire-work. When banding-in we love to spot the occasional bright coloured threads caught in the twine. whilst we are working outdoors in the soft muted palette of an English countryside in winter, the bright primary colours of these threads look incongruous in this setting. These threads allude to women in their colourful saris spinning this twine in warmer Sri Lanka. It is nice to feel that connection, we are all doing a simple job but each is an essential part of the bigger picture.

hop strings

https://www.youtube.com/watch?v=7VvRP3EqnLk

That is what makes the hop growing so interesting, it’s rewarding that however insignificant your job seems, you know you are a small link in the larger chain of the hop growing year.