First Gold hop Setts being planted

PicMonkey Collage
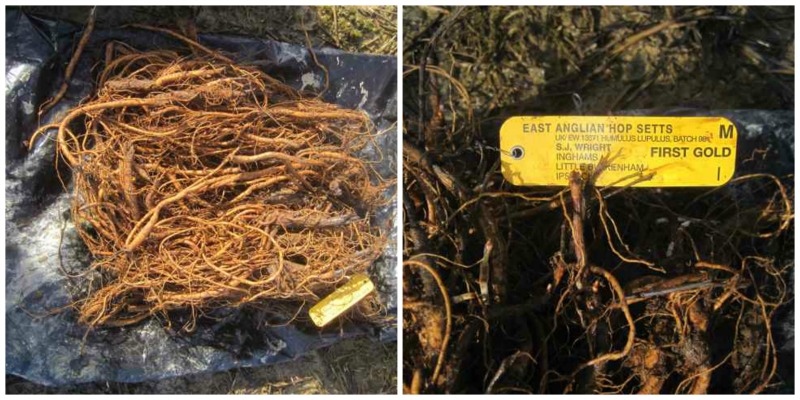
The First Gold hop variety which Ashley chose in the ‘Be A Hop Grower for a Season’ draw arrived earlier this week.

The laid back feel of the outdoor winter work for the hop grower  suddenly ended, stringing and banding are underway but with the delivery of the new hop setts, its all change and we are up on our starting blocks for the off.  Growing hops should come with an Official Government Health Warning, it can be addictive. Ashley you have been warned!  That withstanding I really hope you enjoy our year ahead and the end product.

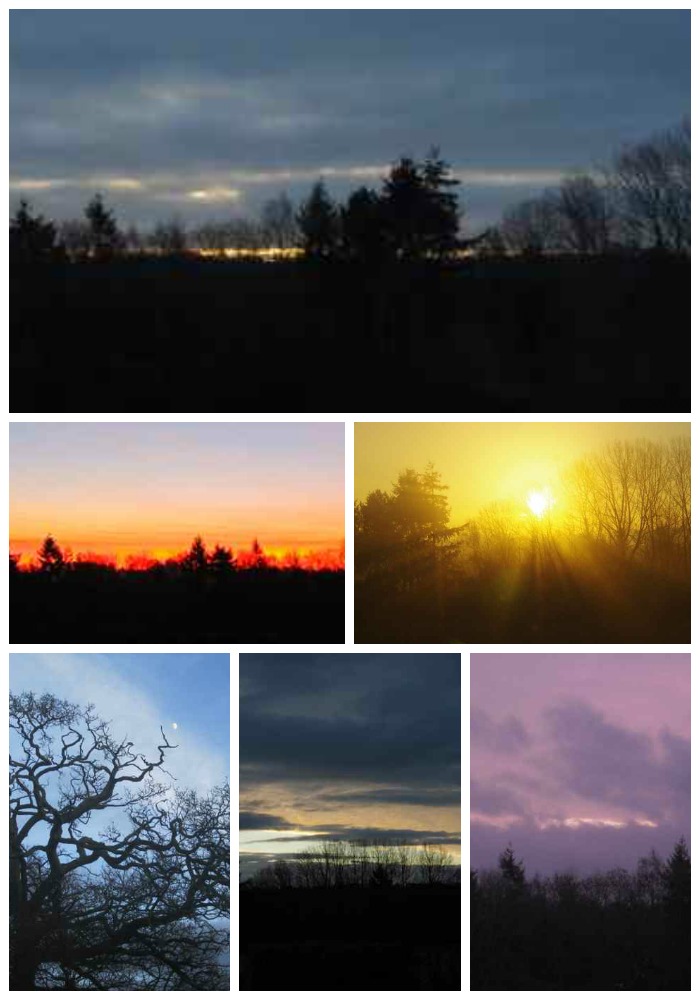
Yesterday 11th February was a beautiful February day, an early ground frost then the sun shone, a perfect day to be outside to start planting hop setts – my friend and I even got our jackets off.  The soft golden sunshine of February to plant out the First Gold hops was very apt, golden light on these First gold hop setts felt like a good omen.

PicMonkey Collage

All the hop setts arrived in perfect condition. Thank you to Stephen Wright who always produces such wonderful quality setts.

The First Gold hop setts were planted out second as that was the space I had chosen for them, leaving the Northern Brewer hops needing to be planted first. Ideally of course the ground could have been drier, but although very sticky on top, it was not too bad once underneath that first yukky layer.   Wealden clay makes it easy at times to think wistfully of the lighter Suffolk soil where these hop setts were grown – we are either soggy or like concrete with only brief windows of ‘just right’ in between these extremes!

The other varieties being planted this year are Chinook hops and Bullion hops.  Four very different hop varieties to brew with, seemingly different looking setts and probably four very different varieties with their own quirks to test a hop grower.   Growing hops is never boring.
heeling in First Gold hop sett


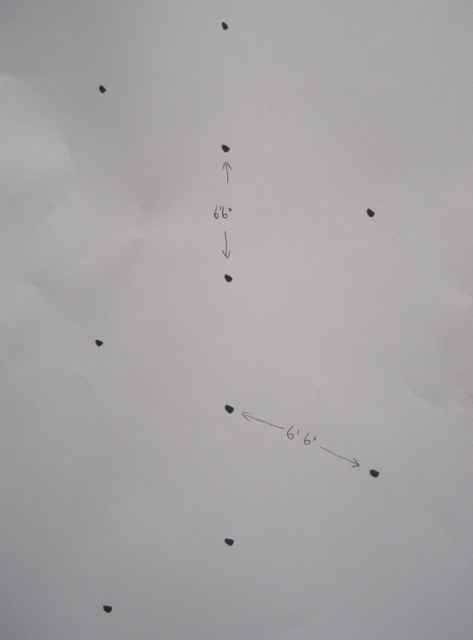
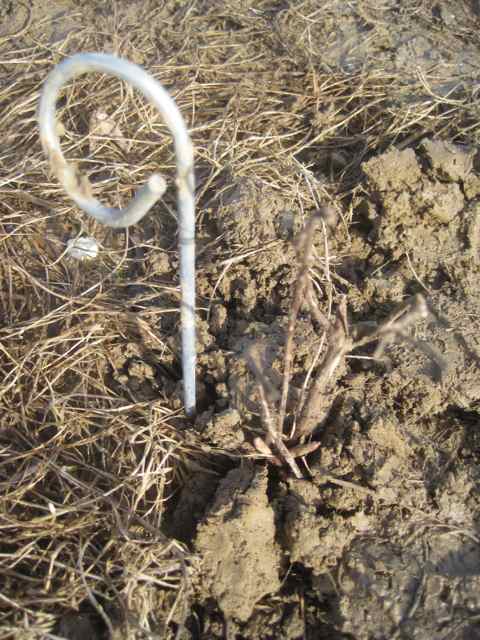
We are doing a trial run for a slightly different style of design for this new hop garden, it requires a different layout for the hop hills when planting. It remains to be seen how successful ( or not! ) this will be but unless you try you don’t know. However it has also meant working out a new hop stringing configuration, which we have nicknamed the Sussex Zig Zag. A plus for this Zig Zag method of growing hops is that it allows plenty of air around the growing bines. In hop gardens strung using the Umbrella method of stringing, the plants are set out at 6’6”, a coincidence that is exactly 2 metres in today’s metric language. Growing hops on the Zig Zag design each hill is planted alternately with 3’3” spacing up a line. But because they are planted alternately either side of the centre line each plant is at least 6’6” from it’s neighbour. The screw pegs are laid out to mark the planting positions for the hop setts and will stay there permanently ready for stringing.

Hopefully this sketch will this make clearer.


new hop garden planting design


saved
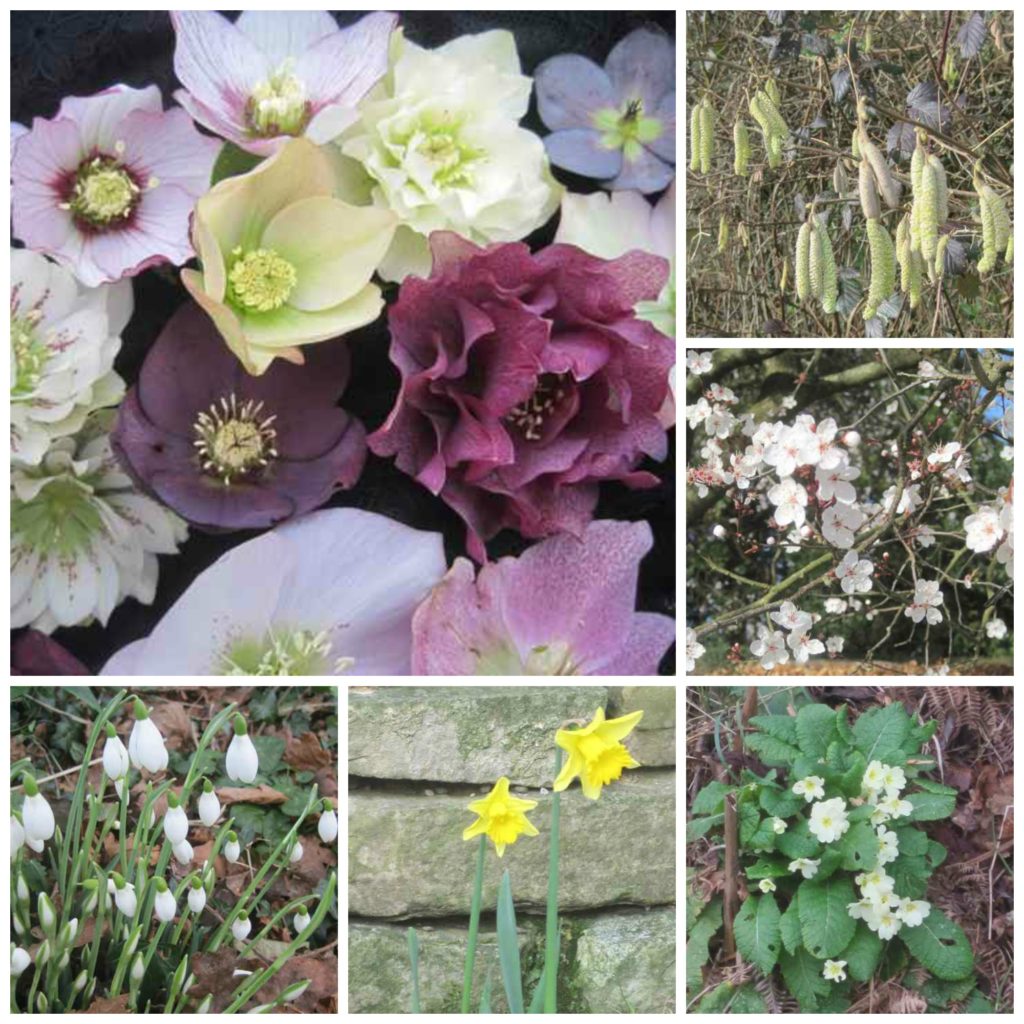
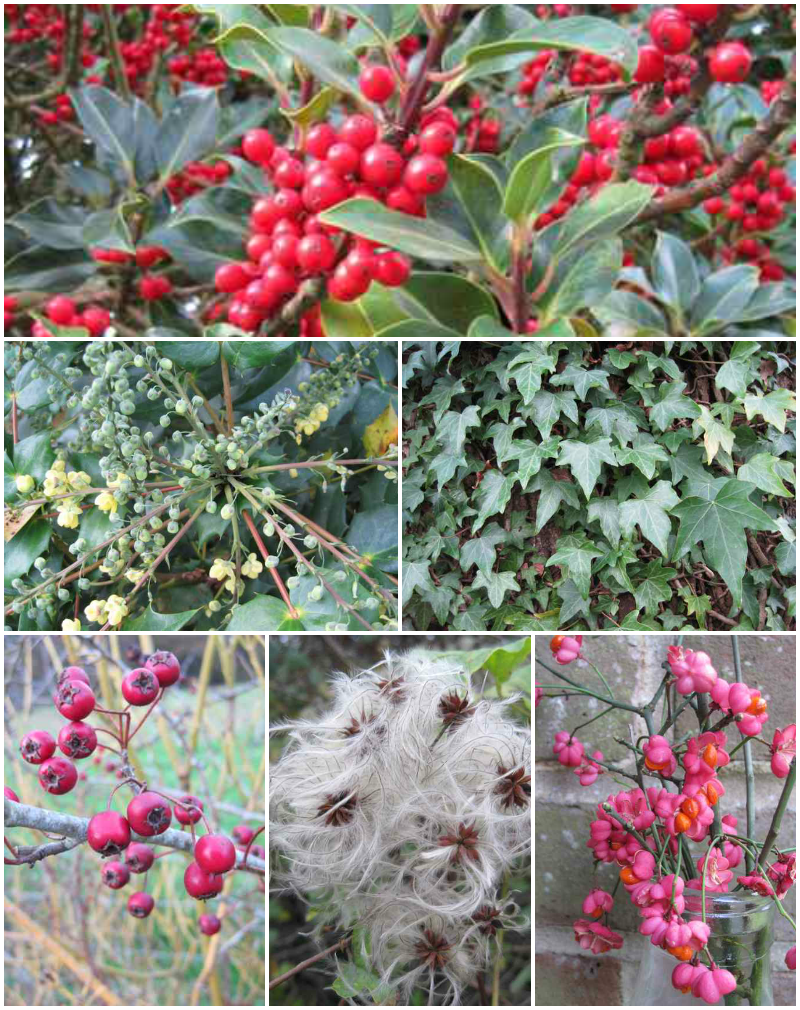
I so love young hops, these new First Gold hop setts for planting now have kicked off that full of promise  ‘spring is here’ feeling!

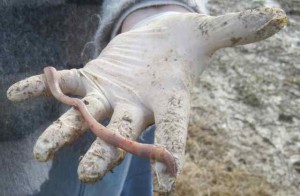
However, for a hop grower I am not the fastest planter, I confess to rescuing earthworms as I see them, then placing them back on the soft soil afterwards. I know I am not alone in being unable to knowingly chop a worm in two.  On the radio I once heard a remark by someone who said           “I could never be friends with someone who deliberately trod on an earthworm” Hear hear to that. But I do love to be hands on and feel the soil. It’s satisfying to see each hop sett nestled in with just the buds showing.  It is important not to plant them too deeply.  The Northern Brewer hop variety and First Gold hop setts were all planted, then spot on cue last night we had heavy rain to settle them in.

First gold hop sett settled in

A First Gold hop sett planted with buds just showing

Target Hops – An Aroma to Brighten the Wet Weather

February so far is certainly living up to its Country Law reputation of :-

‘February Fill Dyke,
Black or White’

Here the fields are sodden and the dykes are all running brim full and black.

sodden fields

Meanwhile we are hoping for a little respite from the wet. With the expected arrival of this years hop setts, we are hoping that when they arrive we will have a week of dry weather to get them settled out nicely into ground.

I have the 4 varieties ordered which were offered as the choices in this winter’s draw   –  Bullion, First Gold, Chinook and Northern Brewer.

In this area on another hop farm, hop stringing, which is still all done by hand began on nice days at end of January. Flat caps essential!

target hops being strung

Meanwhile indoors our kitchen larder has the delicious aroma from an opened pack of target hops awaiting the next brewing session.

Every time the door is opened we are treated to a mouth wateringly delicious spicy rich fruit cake type aroma – I cannot help wondering why this dual purpose variety is not more poplar for home brewing.

However dull it seems there are signs everywhere that spring is on its way – primroses in flower on sunny banks, green shoots poking up through the soil, the first snowdrops and catkins.

catking on the hop farm

Our ‘Be a Hop Grower for a Season’ Competition Winner is…

Congratulations Ashley C is the winner of the draw in our ‘Be a Hop Grower for a Season‘ competition.

Thank you to everyone who entered, I hope you’ll still enjoy following the progress of Ashley’s year as a virtual hop grower.  Ashley’s hop selection is First Gold.

The hop shop is now open!

Ron the Adjustable Spanner ‘Smith’

As we were talking of vintage last time, this might be of interest to any of you out there that like engineering, spanners or generally tinkering.

The Adjustable Spanner (Ron Geesin) , published by The Crowood Press, February 2016 has everything you’ll ever need to know about the world of the adjustable spanner – prepare to be amazed…


Vintage Hop Press Revamp

Whilst servicing goes on throughout the year on any farm, winter is the time for repairs or any major maintenance jobs. This year the hand hop press, which was a very special gift, needed repairing. This ancient J L Larkworthy from Worcestershire wasn’t exactly broken but when it was used last September for the first time since 1982, it had thrown up a problem that definitely needed fixing before next year.

vintage hop press

The hop press works by using the inherent weight of its stem combined with its gearing. The hop pocket is supported underneath by a sling below, the top being secured by a ring at floor level and when the empty pocket is filled up with loose dried hops, the press is put out of gear allowing the pan to fall utilising gravity and its own weight to do the initial stage of each pressing for you. You then put it back into gear and wind down the handle to apply the final pressure needed on each pressing before winding it back up to repeat the process all over again.

dried hops cooling on the floor


You simply repeat this sequence until the hop pocket is full of pressed hops. Each pocket will usually take 8 to 12 pressings to fill, depending on the variety of hops. The pocket is then sewn up and dropped out to the chamber below in a traditional oast and the next pocket put in. In a modern oast, pockets are often pressed into a hole in the concrete floor and then winched out. These days pockets are in fact fast being superseded by square bales which are smaller, easier to lift and move on pallets and more efficient to stack in a warehouse.

What’s to go wrong? Well nothing one would imagine with a hand winding mechanism, all that is needed is to keep the hop press well oiled. However, the out-of-gear initial ‘free fall’ is an important part of the process as hand winding throughout the whole process would make the work painfully slow and tedious, hence you want the press to do what it was designed to do, which is a good percentage of the work for you. The large wheel here weaved out of alignment by an inch, so naturally we thought the cast iron wheel itself was slightly warped. That in itself, though not perfect would have been fine.

However, when using it with hops underneath, it was the first time it was able to be put out of gear to free fall – omg what was that? there was a horrible noise as the cogs on the outside of the large wheel hit the edges of the cast iron casing which hold the gearing, then as the wheel weaved lopsidedly an inch to the other side it touched the main gear cog. Each of these contacts was by only a smidge, but a smidge would be just enough to cause the cast iron teeth to shear off eventually, hence it was top of the list of priority ‘get fixed this winter’ jobs. Oddly it did not hit the sides when it was wound throughout by hand.

The large wheel was removed along with the shaft but it was not the wheel that was bent as we had thought, it was only the very end of the shaft which protrudes from the main press body to hold the large drive wheel, it was barely noticeable at a quick glance.

hop press disassembled for repair

hop press wheel and key-way

This press was built as a hand press around 1900, converted to be used as an electrically operated press in 1970 it was used as such up until1982. The forces are much greater when powered by an electric motor, hence it is most likely that over this 12 year period with these extra forces, this was when the slight bend at the shaft end occurred. This did not show up until it was brought out of retirement and converted back to be used as a hand hop press 33 years later. I do not think there are many or indeed any hand presses being used nowadays, they would simply not be efficient on any large farm.

We took the large drive wheel and shaft to a local engineering firm to be straightened as much as possible and a new key-way was rebuilt.

hop press shaft after straightening and new key way cut

The wheel will always show a very slight weave but this is quite acceptable, the shaft is still original, it is part of its history now and it no longer hits other parts of the frame, so does not matter.

hop press not hitting edges now

Taking things off an old press is one thing but reassembly is quite another, it does not go exactly as you think it should and once the shaft had been straightened it had knock on effect on other bolts and alignment of the metal fixings.  With the wheel off my husband had put on the original handle that had to be cut off when the hop press was electrified.

vintage hop press new handle being welded on

Beautiful, now fully resorted it’s as good as new and rearing to go.

hop press final test to check alignment is all correct before tightening nuts

This wry extract is from a family poem from where the press came from, it was written in 1970 –  this same press gets a mention, as does the nightmare every grower dreads, of having a hop garden down ……

A second hand machine, was the next good buy

It will save us pounds up went the cry.

It came from Cranbrook, all complete

We built the shed and laid concrete.


They fitted new rollers and an electric press

whether it will work is any ones guess.

The next year we grew a tremendous crop

The bines went straight up and over the top.


One week before picking amidst heavy rain

The anchor wires snapped and down it all came!

Thumb’s up for the ‘brew in a bag’ method for an easy home beer making process

I am now on dangerous ground, as the saying warns ‘Fool’s rush in where Angels fear to tread’,  so this Angel is treading very very carefully!   I fully respect that everyone has their own special method to produce their perfect craft beer at home and I am certainly not giving any advise but will only explain my husband’s beer making process and show you the very basic kit which he uses, should anyone be interested.

My husband is a home brewer, but being a farmer first and foremost with the  ‘make, mend and do’  attitude firmly ingrained into his psyche, whilst he has often looked longingly at the Braumeister style apparatus, he remains stoically loyal to the very basic beer brewing kit he already has.  You don’t need any fancy brew kit to get going with the beer making process.   The main components of his home brew hardware did not start out life as beer brewing equipment at all, but has been reinvented for purpose and he would be loathe to change it –  it works well, therefore he reckons if it’s not broken, don’t fix it!

His beer brewing equipment is –

  • 2 stainless steel redundant ex milk buckets, (one for the brewing and one for the fermentation vessel)
  • An old tin bath, which is topped off by an even more ancient gas stove that lives outside (under cover of course)  A practical plus for this stove is that the steam during the hour long rolling boil, all happens outdoors and not in the kitchen.   Another plus for his beer brewing equipment is the simplicity of cleaning it and how little equipment there actually is to clean.
  • A glass hydrometer was a survivor from years ago, during our brief and very variable sortie into wine making
  • A stainless steel strainer we already had.  This strainer has now been requisitioned by the brewing department.   the kit

New kit purchased was:

  • a thermometer
  • tubing for syphoning
  • nylon voile for the bags.  Bags were actually made from fine mesh nylon curtaining which is perfect.  They are best  sewn up to approximately to fit the container being used.  You just need to make sure the bag is kept off the bottom of your vessel whilst the heat is on,  an upturned colander or similar will suffice.

He brews 10 litres at a time rather than what I understand to be the more normal 20  litres. The theory behind these 10 litre brews is that the buckets are easier to lift and recipes can be tweaked or a completely different home beer recipe tried without any concern that you may have lot of beer you do not like.   This has only been the case once so far, he over-hopped a brew that made American IPA’s look insipid!   I thought my hair would curl, but it did make an excellent shandy.

When he first came across  about the Australian ‘brew in a bag’ method   he thought it sounded rather corny, but after trying it, this method is no gimmick.     The basic rules for all brewing are simple – have scrupulously clean equipment and bottles, good quality ingredients, accurate temperatures, accurate timings and in this case careful removal of the bag of malt so it can drain naturally.  Resisting the temptation to give it a squeeze.

I am sure everyone has their own very personal preferences to technique, hence my caution writing about this but if the proof of the pudding is in the eating (or drinking in this case!)   then this method has a full 10/10 and big thumbs up from me.

I am shortly to have a tentative foray in to the world of brewing but using hops and no malt!  But that will be for another time.

Quick guide to the easy home beer making process ‘BREW IN A BAG’ method with one of my husbands recipes

NB -To end up with approx 9 litres to bottle you need to start with 13 litres of water

Ingredients for his American Light Bitter

1.5kg pale malted barley

75gm crystal malt

130gm Polenta

2ozs Goldings hops

1oz Cascade hops

Halfera packet of S-05 yeast

Method

*Bring 13 litres water to 67C

*Put malts and polenta in the voile bag, gently lower and prod carefully down to wet grains (you do not want to introduce any air at this point) Tie top of bag securely to top of the brew vessel.  Steep for 70 mins at 67C.       You can turn off heat if needs be to keep temperature level.

*Remove bag of malt and allow to drain into the vessel. Do not squeeze, it is very tempting! but DON’T DO IT!

allowing the malt to drain- do not squeeze

*Bring wort to a rolling boil for 1 hour in total, adding 1oz golding hops immediately boiling point is reached.

After 30 mins add 1oz Goldings hops then for the last 10 mins of the boil add the Cascade hops.

weighing t he hops

* Strain hops from wort and immediately cool as quickly as possible to 25C.   The old tin bath is perfect here.   To help wort oxygenate at this stage the wort can be strained to and fro between both stainless steel vessels a few times. This also helps speed the cooling.

straining the hops off

coolin gdown

watching the temperature

*Once at 25C stand vessel in warm environment to ferment and add yeast.  My husband uses the open top method with this vessel, covering it with a nylon cover then a clean cotton cloth.

Bottled when hydrometer shows it is ready or after about 10 days.

all done only the wait now

If you are interested to see  this home beer making process of  ‘brewing in a bag’ this lady has it down to a fine art.